Practice first primer for beginners: inventory gear, hang and patch fixtures, focus and write cues, follow DMX and rigging safety, and know when to rent a...
Stage lighting makes performers visible and tells the audience where to look. That is the whole job, whether you are running a school play or a backyard concert. If you are just starting out, do two things before anything else: check what fixtures and cables you actually have on hand, and sketch three lighting areas on your stage plan so you know where light needs to land.
TL;DR:
• Smaller productions can rely on LED wash fixtures paired with one or two ellipsoidal units for specials to avoid overloading circuits.
• Proper positioning of front, side, and back lighting is essential for giving depth and avoiding flat-faced looks during performances.
• Knowing key terms like instrument, channel, patch, and gel helps prevent confusion during setup and makes troubleshooting easier.
• Focus and cue writing should be systematic, aiming for level consistency and clear organization to ensure cues hold during live performances.
• Renting comprehensive lighting packages with on-site staff offers a practical alternative to building a rig, especially for larger or time-constrained events.
• Why Stage Lighting Matters for Storytelling
• Stage Lighting Terms Every Beginner Should Know
• Common Fixtures to Learn First and What Each Is Best For
• Lighting Positions and Angles That Shape Depth
• Color, Intensity, and Direction: Shaping Mood Without Losing Faces
• A Step-by-Step Plan for Your First Show
• Control Basics and Safety Rules You Can’t Skip
• How to Focus Fixtures and Write Cues That Hold Up
• What Experience Teaches You About Lighting Design
• When Renting Lighting Beats Building It Yourself
• Where to Go Deeper on Lighting Technique
• Sources
• FAQ
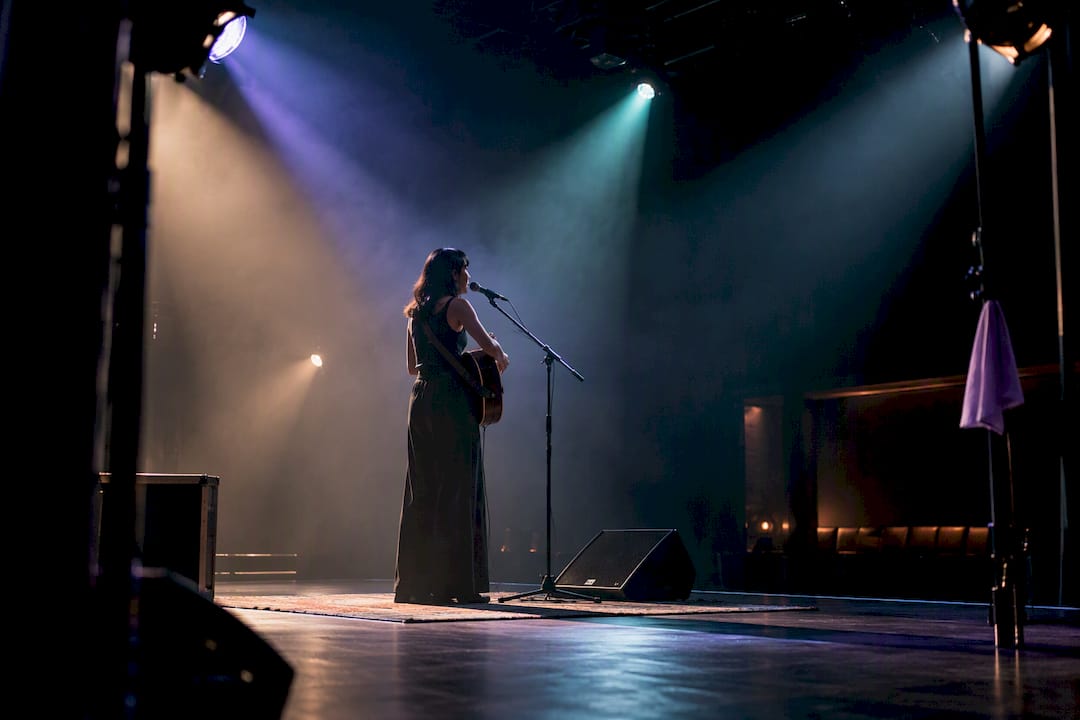
Lighting has five practical jobs: it makes people visible, reveals the shape and dimension of a face or body, organizes what the audience sees first, sets mood, and delivers information about time and place. A single spotlight on a soloist does all five at once: it lights the singer’s face, models their features so they don’t look flat, isolates them from the group, and signals that this moment matters.
Every one of those jobs comes down to four properties you control on every fixture:
• Intensity: how bright the light is, adjusted by dimmer or console fader.
• Color: warm, cool, or saturated, set by gel or LED mixing.
• Distribution: where the beam points and how wide it spreads.
• Texture: the beam’s edge quality, from sharp-edged to soft and diffuse.
A monologue usually calls for a tight, warm special that keeps the focus on one face. A chorus number wants broad, even washes so no one disappears into shadow. A big reveal, like a curtain drop or surprise entrance, often uses a sudden intensity change to punch the moment. Once you start thinking in these four properties instead of just “turn on more lights,” your design choices get a lot more deliberate.
Rental invoices, plots, and console menus all use the same shorthand. Knowing it up front saves you from guessing during a load-in.
• Instrument: the fixture itself, whatever type it is.
• Dimmer: the device that controls how much power reaches a fixture.
• Channel: the console fader you use to control one or a group of instruments.
• Patch: the assignment linking a channel to a specific dimmer or DMX address.
• Gel: colored film placed in front of a fixture to tint the beam.
• Gobo: a metal or glass template that projects a pattern or texture.
• Hotspot: the brightest point inside a beam, usually its center.
• Wash: a broad, even field of light covering an area rather than a single point.
• Spot: a narrow, focused beam aimed at one performer or area.
• Magic sheet: a simplified diagram showing what each light does and where it points.
• Cue: a recorded lighting look, triggered at a specific moment in the show.
• Focus: the process of aiming and shaping a fixture’s beam.
When you’re handed an instrument schedule, read it left to right: instrument type, position, channel, color, and purpose. That order tells you everything you need to hang and patch correctly without asking a dozen follow-up questions.
You don’t need to know every fixture on the market. Six types cover almost everything a beginner will run into.
1. Ellipsoidal reflector spotlight (ERS or profile): Produces a sharp, controllable beam with adjustable shutters for crisp edges, which makes it the go-to for specials and precise area lighting. Barrel sizes vary, and shorter barrels throw wider beams while longer ones narrow the field.
2. Fresnel: Gives a soft-edged beam that blends nicely into neighboring washes, which is why it shows up often for general stage wash and footlighting.
3. PAR and LED wash fixtures: Deliver wide, even coverage across a large area, useful for cyc lighting or filling a stage with color without hard edges.
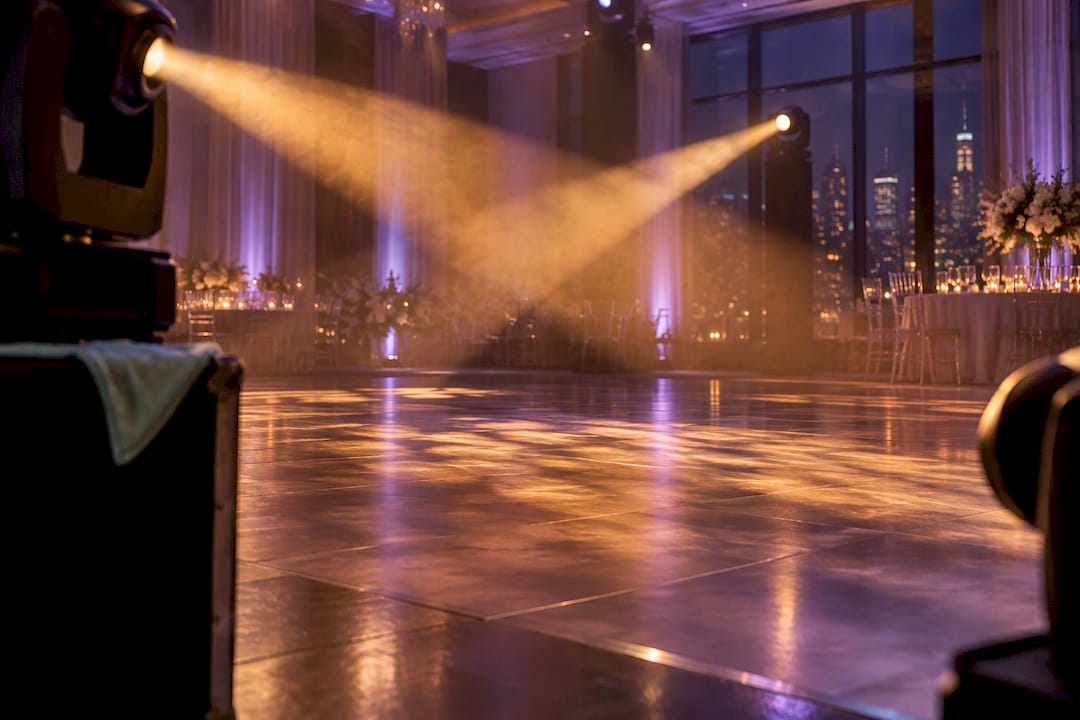
4. Moving heads: Automated fixtures that pan and tilt on command, letting a small crew cover effects that would otherwise need several static fixtures and extra hands.
5. Followspots: Manually operated units that track a performer around the stage, which means you need a dedicated operator, not just a programmed cue.
6. Specials: Any fixture assigned a one-off purpose, like lighting a single chair or doorway, rather than part of a general wash.
LED and tungsten fixtures solve different problems. LEDs run cooler, use less power, and mix color electronically without swapping gels, which is a real advantage for small crews on tight power budgets. Tungsten fixtures still produce a warmer, more familiar quality of light that some designers prefer for skin tones, but they draw more power and generate more heat near the housing. For a first setup, LED wash fixtures paired with one or two ERS units for specials cover most small shows without overloading your circuits or your crew’s attention.
Flat, front-only lighting flattens faces and kills shadow detail, which is why designers rely on three directions working together: front light for visibility, side light for shape, and back or top light to separate performers from the background. Front light alone leaves performers looking like paper cutouts against the set, according to Yale College Arts, so side and back angles are what actually give a face dimension.
You’ll typically hang fixtures in a handful of standard positions:
• Front of house (FOH): positions out over the audience, providing the primary front angle.
• Electrics: overhead bars that cross the stage, carrying top and back light.
• Booms: vertical pipes on the sides of the stage for side lighting.
• Box booms: side positions built into the house, similar in function to booms but fixed to the room.
• Balcony rail: a front position used in rooms with a balcony, angled steeper than typical FOH.
A simple rule for your first plot: light the acting areas, not the walls behind them, and keep spill off the audience so people aren’t squinting during the show. Mark the edges of your rig and cable runs with tape so no one trips during a blackout scene change.
Color choice changes how an audience reads a scene before a single line is spoken. Warm tones (ambers, warm pinks) read as intimate or nostalgic, while cool tones (blues, lavenders) read as distant, cold, or nighttime. The catch is that no light source is truly neutral, which is why designers test gels or LED mixes directly against costume and set swatches before committing, per Yale’s lighting guidance. A gel that looks great on white fabric can turn muddy against a patterned costume.
LED fixtures let you mix color electronically, which is faster than swapping gel frames mid-show, but traditional gels still earn their place when you need a precise, repeatable color that matches a specific costume or set piece exactly.
• Keep faces readable: balance intensity so mood-setting color doesn’t drop performers into shadow.
• Layer, don’t flood: combine a lower-intensity color wash with a brighter front special rather than raising everything at once.
• Test before tech: run gel or LED choices against actual costumes under stage conditions, not under work lights.
Try three quick practice looks: a bright, neutral daytime wash; a dim, blue-toned night look; and a warm, low-angle sunset special. Running all three on the same performers teaches you more about intensity and direction than any amount of reading.
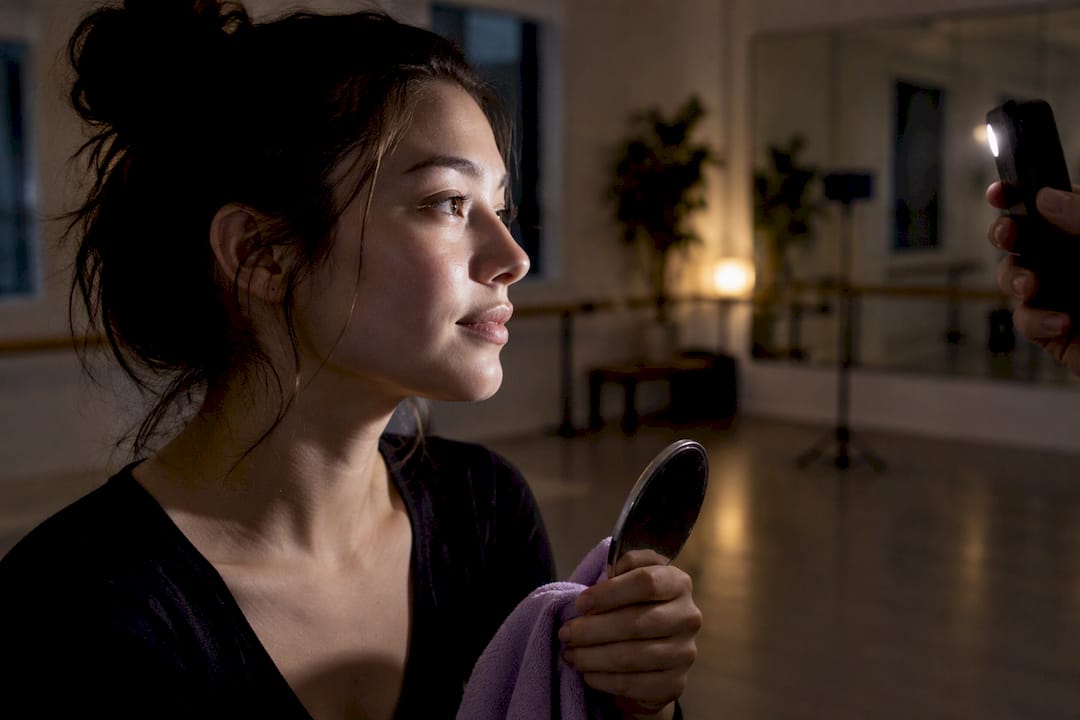
Pro Tip: Light a friend’s face at three different angles with your phone flashlight before touch, and you’ll see instantly why side light does what front light can’t.
Running a small show comes down to five stages, done in order.
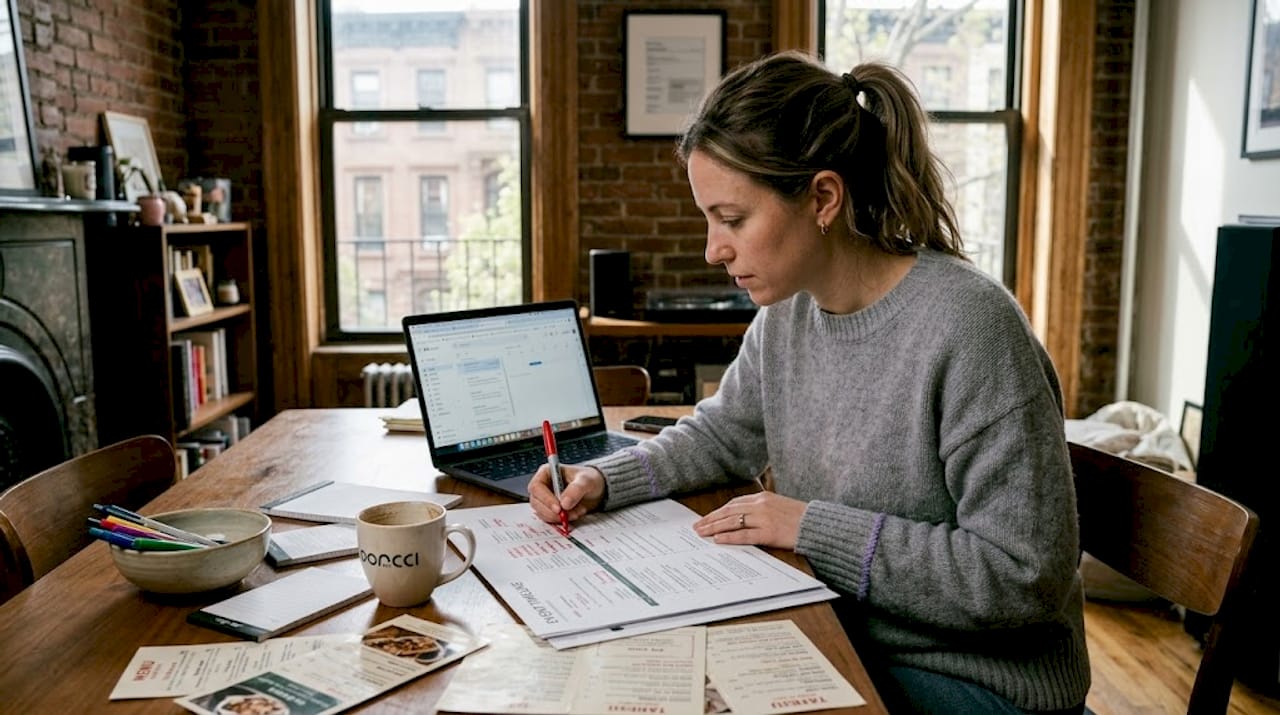
1. Inventory and paperwork: confirm venue power, gather your fixture list, and write or request a lighting plot before you touch a single cable.
2. Hang and circuit: group fixtures by function (front wash, side light, specials) and label every cable and connector as you go, so troubleshooting later doesn’t turn into guesswork.
3. Patch: assign each fixture a channel and address on your console, and save a basic pre-cue with everything at a working level before you start focusing.
4. Focus: aim and shape each fixture in the order it appears on your plot, working from front to back so you’re not climbing past finished work.
5. Cue and rehearse: write your cues, then run a cue-to-cue (Q2Q) pass where you jump straight between lighting changes without running full scenes, followed by a dry tech to check timing before actors are involved.
A small one-act show can often move through this whole sequence in a single focused day if the venue and equipment are ready ahead of time. Our step-by-step lighting setup guide walks through the same logistics for event-based setups, which follow a nearly identical timeline.
Most beginner rigs run on DMX-512A, the standard lighting control protocol. A single DMX universe can control up to 512 individual addresses, which is plenty for a small show but worth knowing before you plan a patch that assumes unlimited channels.
• Use DMX-rated shielded cable, not audio or generic cable, since most DMX problems trace back to poor cable quality or missing termination.
• Terminate the end of every DMX line, and avoid running data cable alongside heavy mains power to cut down on interference.
• Never daisy-chain extension cords to reach a fixture, and keep any cable off a hot fixture housing.
• Inspect rigging hardware before every use, and mark stage edges and cable runs clearly for crew and performer safety, guidance echoed in the performing arts safety manual.
Some jobs go past a beginner’s scope. Call in a professional for motorized rigging, large power distribution across multiple circuits, or any flying scenery involved in the show. Those situations carry real injury risk if the load calculations or mechanical checks aren’t done by someone trained for it.
Focusing is where your plot becomes reality. Work through it methodically:
1. Find the hotspot by aiming the fixture and locking it once the brightest point lands where you want it.
2. Set the head angle so the beam clears set pieces and hits the intended acting area, not the floor in front of it.
3. Shape the edge using shutters, an iris, or frost, depending on whether you need a hard cut or a soft blend.
4. Record the result on your magic sheet, and take a quick reference photo so you can reset the fixture if it gets bumped.
Once focus is locked, cue writing is mostly organization. Name cues clearly, note the level for each channel, and set crossfade timing that matches the pace of the moment, quick for a snap change, slow for a fade to black. Test every cue with performers in place before opening night, save a backup of your show file, and run a full cue-to-cue rehearsal so the operator and cast both know what to expect.
A lighting plot is a blueprint, and the crew executing it deserves the same respect you’d give an architect’s drawing. Chasing one flashy effect at the expense of a solid rehearsal is a bad trade. Small crews with a clear plan and a short list of priorities consistently outperform bigger setups with no plan at all.
— PORCCI
Planning your own rig teaches you a lot, but not every event has the time, crew, or budget for a full build. That is where a staffed rental makes sense. A staffed rental service handles the parts that eat up a beginner’s whole weekend: choosing the right fixtures, running clean cable, and having a technician on-site so the lighting actually works when guests arrive.
• Rental packages often include delivery, setup, and breakdown, so you don’t have to learn to focus fixtures the morning of your event.
• Technical staff can run cues and troubleshoot live, which matters most for larger parties, corporate events, or anything with a tight schedule.
• Packages can scale from a small private party to a full production, avoiding paying for more than the event needs.
If your event calls for lighting alongside sound or a DJ, our AV and sound rental packages pair well with a lighting setup, and our event staffing page covers adding a technician to run the show. For a quote tailored to your event, start with our quote page.
For technical control standards, see the ESTA DMX512-A guide. For rigging and electrical safety, consult the performing arts safety manual. For a structured learning path, review the CityTech lighting syllabus.
• Performing arts lighting guidance (UCOP)
• How to light a show (Yale College Arts)
• Recommended practice for DMX512 (ESTA)
• Performing arts safety manual (Utah Risk)
• Stage lighting syllabus (CityTech/CUNY)
Stage lighting is built around visibility, revealing form, composition, mood, and information, controlled through intensity, color, distribution, and texture. Designers combine front, side, and back angles to model performers rather than flatten them, as outlined by Yale College Arts.
The five commonly taught elements are visibility, form, composition, mood, and information, each shaped by the four controllable light properties of intensity, color, distribution, and texture. Together they determine what an audience sees and how they feel about it.
The three core lighting directions are front light, side light, and back or top light, each solving a different visibility or shaping problem. Front light makes performers visible, side light reveals shape and depth, and back light separates them from the background, a structure detailed by Yale College Arts.
At minimum, you need fixtures suited to your space (ERS units for specials, wash fixtures for general coverage), a dimmer or DMX-controlled console, DMX-rated cable, and a lighting plot to guide your hang and focus. Beginners running a small event without the time to build this themselves often turn to a rental package with delivery, setup, and on-site tech support instead.
A single DMX universe supports up to 512 addresses, which comfortably covers most small productions and events. Larger shows with many moving fixtures may need multiple universes, but a beginner setup rarely runs into that limit.
Practice first primer for beginners: inventory gear, hang and patch fixtures, focus and write cues, follow DMX and rigging safety, and know when to rent a...
Stage lighting makes performers visible and tells the audience where to look. That is the whole job, whether you are running a school play or a backyard concert. If you are just starting out, do two things before anything else: check what fixtures and cables you actually have on hand, and sketch three lighting areas on your stage plan so you know where light needs to land.
TL;DR:
• Smaller productions can rely on LED wash fixtures paired with one or two ellipsoidal units for specials to avoid overloading circuits.
• Proper positioning of front, side, and back lighting is essential for giving depth and avoiding flat-faced looks during performances.
• Knowing key terms like instrument, channel, patch, and gel helps prevent confusion during setup and makes troubleshooting easier.
• Focus and cue writing should be systematic, aiming for level consistency and clear organization to ensure cues hold during live performances.
• Renting comprehensive lighting packages with on-site staff offers a practical alternative to building a rig, especially for larger or time-constrained events.
• Why Stage Lighting Matters for Storytelling
• Stage Lighting Terms Every Beginner Should Know
• Common Fixtures to Learn First and What Each Is Best For
• Lighting Positions and Angles That Shape Depth
• Color, Intensity, and Direction: Shaping Mood Without Losing Faces
• A Step-by-Step Plan for Your First Show
• Control Basics and Safety Rules You Can’t Skip
• How to Focus Fixtures and Write Cues That Hold Up
• What Experience Teaches You About Lighting Design
• When Renting Lighting Beats Building It Yourself
• Where to Go Deeper on Lighting Technique
• Sources
• FAQ
Lighting has five practical jobs: it makes people visible, reveals the shape and dimension of a face or body, organizes what the audience sees first, sets mood, and delivers information about time and place. A single spotlight on a soloist does all five at once: it lights the singer’s face, models their features so they don’t look flat, isolates them from the group, and signals that this moment matters.
Every one of those jobs comes down to four properties you control on every fixture:
• Intensity: how bright the light is, adjusted by dimmer or console fader.
• Color: warm, cool, or saturated, set by gel or LED mixing.
• Distribution: where the beam points and how wide it spreads.
• Texture: the beam’s edge quality, from sharp-edged to soft and diffuse.
A monologue usually calls for a tight, warm special that keeps the focus on one face. A chorus number wants broad, even washes so no one disappears into shadow. A big reveal, like a curtain drop or surprise entrance, often uses a sudden intensity change to punch the moment. Once you start thinking in these four properties instead of just “turn on more lights,” your design choices get a lot more deliberate.
Rental invoices, plots, and console menus all use the same shorthand. Knowing it up front saves you from guessing during a load-in.
• Instrument: the fixture itself, whatever type it is.
• Dimmer: the device that controls how much power reaches a fixture.
• Channel: the console fader you use to control one or a group of instruments.
• Patch: the assignment linking a channel to a specific dimmer or DMX address.
• Gel: colored film placed in front of a fixture to tint the beam.
• Gobo: a metal or glass template that projects a pattern or texture.
• Hotspot: the brightest point inside a beam, usually its center.
• Wash: a broad, even field of light covering an area rather than a single point.
• Spot: a narrow, focused beam aimed at one performer or area.
• Magic sheet: a simplified diagram showing what each light does and where it points.
• Cue: a recorded lighting look, triggered at a specific moment in the show.
• Focus: the process of aiming and shaping a fixture’s beam.
When you’re handed an instrument schedule, read it left to right: instrument type, position, channel, color, and purpose. That order tells you everything you need to hang and patch correctly without asking a dozen follow-up questions.
You don’t need to know every fixture on the market. Six types cover almost everything a beginner will run into.
1. Ellipsoidal reflector spotlight (ERS or profile): Produces a sharp, controllable beam with adjustable shutters for crisp edges, which makes it the go-to for specials and precise area lighting. Barrel sizes vary, and shorter barrels throw wider beams while longer ones narrow the field.
2. Fresnel: Gives a soft-edged beam that blends nicely into neighboring washes, which is why it shows up often for general stage wash and footlighting.
3. PAR and LED wash fixtures: Deliver wide, even coverage across a large area, useful for cyc lighting or filling a stage with color without hard edges.
4. Moving heads: Automated fixtures that pan and tilt on command, letting a small crew cover effects that would otherwise need several static fixtures and extra hands.
5. Followspots: Manually operated units that track a performer around the stage, which means you need a dedicated operator, not just a programmed cue.
6. Specials: Any fixture assigned a one-off purpose, like lighting a single chair or doorway, rather than part of a general wash.
LED and tungsten fixtures solve different problems. LEDs run cooler, use less power, and mix color electronically without swapping gels, which is a real advantage for small crews on tight power budgets. Tungsten fixtures still produce a warmer, more familiar quality of light that some designers prefer for skin tones, but they draw more power and generate more heat near the housing. For a first setup, LED wash fixtures paired with one or two ERS units for specials cover most small shows without overloading your circuits or your crew’s attention.
Flat, front-only lighting flattens faces and kills shadow detail, which is why designers rely on three directions working together: front light for visibility, side light for shape, and back or top light to separate performers from the background. Front light alone leaves performers looking like paper cutouts against the set, according to Yale College Arts, so side and back angles are what actually give a face dimension.
You’ll typically hang fixtures in a handful of standard positions:
• Front of house (FOH): positions out over the audience, providing the primary front angle.
• Electrics: overhead bars that cross the stage, carrying top and back light.
• Booms: vertical pipes on the sides of the stage for side lighting.
• Box booms: side positions built into the house, similar in function to booms but fixed to the room.
• Balcony rail: a front position used in rooms with a balcony, angled steeper than typical FOH.
A simple rule for your first plot: light the acting areas, not the walls behind them, and keep spill off the audience so people aren’t squinting during the show. Mark the edges of your rig and cable runs with tape so no one trips during a blackout scene change.
Color choice changes how an audience reads a scene before a single line is spoken. Warm tones (ambers, warm pinks) read as intimate or nostalgic, while cool tones (blues, lavenders) read as distant, cold, or nighttime. The catch is that no light source is truly neutral, which is why designers test gels or LED mixes directly against costume and set swatches before committing, per Yale’s lighting guidance. A gel that looks great on white fabric can turn muddy against a patterned costume.
LED fixtures let you mix color electronically, which is faster than swapping gel frames mid-show, but traditional gels still earn their place when you need a precise, repeatable color that matches a specific costume or set piece exactly.
• Keep faces readable: balance intensity so mood-setting color doesn’t drop performers into shadow.
• Layer, don’t flood: combine a lower-intensity color wash with a brighter front special rather than raising everything at once.
• Test before tech: run gel or LED choices against actual costumes under stage conditions, not under work lights.
Try three quick practice looks: a bright, neutral daytime wash; a dim, blue-toned night look; and a warm, low-angle sunset special. Running all three on the same performers teaches you more about intensity and direction than any amount of reading.
Pro Tip: Light a friend’s face at three different angles with your phone flashlight before touch, and you’ll see instantly why side light does what front light can’t.
Running a small show comes down to five stages, done in order.
1. Inventory and paperwork: confirm venue power, gather your fixture list, and write or request a lighting plot before you touch a single cable.
2. Hang and circuit: group fixtures by function (front wash, side light, specials) and label every cable and connector as you go, so troubleshooting later doesn’t turn into guesswork.
3. Patch: assign each fixture a channel and address on your console, and save a basic pre-cue with everything at a working level before you start focusing.
4. Focus: aim and shape each fixture in the order it appears on your plot, working from front to back so you’re not climbing past finished work.
5. Cue and rehearse: write your cues, then run a cue-to-cue (Q2Q) pass where you jump straight between lighting changes without running full scenes, followed by a dry tech to check timing before actors are involved.
A small one-act show can often move through this whole sequence in a single focused day if the venue and equipment are ready ahead of time. Our step-by-step lighting setup guide walks through the same logistics for event-based setups, which follow a nearly identical timeline.
Most beginner rigs run on DMX-512A, the standard lighting control protocol. A single DMX universe can control up to 512 individual addresses, which is plenty for a small show but worth knowing before you plan a patch that assumes unlimited channels.
• Use DMX-rated shielded cable, not audio or generic cable, since most DMX problems trace back to poor cable quality or missing termination.
• Terminate the end of every DMX line, and avoid running data cable alongside heavy mains power to cut down on interference.
• Never daisy-chain extension cords to reach a fixture, and keep any cable off a hot fixture housing.
• Inspect rigging hardware before every use, and mark stage edges and cable runs clearly for crew and performer safety, guidance echoed in the performing arts safety manual.
Some jobs go past a beginner’s scope. Call in a professional for motorized rigging, large power distribution across multiple circuits, or any flying scenery involved in the show. Those situations carry real injury risk if the load calculations or mechanical checks aren’t done by someone trained for it.
Focusing is where your plot becomes reality. Work through it methodically:
1. Find the hotspot by aiming the fixture and locking it once the brightest point lands where you want it.
2. Set the head angle so the beam clears set pieces and hits the intended acting area, not the floor in front of it.
3. Shape the edge using shutters, an iris, or frost, depending on whether you need a hard cut or a soft blend.
4. Record the result on your magic sheet, and take a quick reference photo so you can reset the fixture if it gets bumped.
Once focus is locked, cue writing is mostly organization. Name cues clearly, note the level for each channel, and set crossfade timing that matches the pace of the moment, quick for a snap change, slow for a fade to black. Test every cue with performers in place before opening night, save a backup of your show file, and run a full cue-to-cue rehearsal so the operator and cast both know what to expect.
A lighting plot is a blueprint, and the crew executing it deserves the same respect you’d give an architect’s drawing. Chasing one flashy effect at the expense of a solid rehearsal is a bad trade. Small crews with a clear plan and a short list of priorities consistently outperform bigger setups with no plan at all.
— PORCCI
Planning your own rig teaches you a lot, but not every event has the time, crew, or budget for a full build. That is where a staffed rental makes sense. A staffed rental service handles the parts that eat up a beginner’s whole weekend: choosing the right fixtures, running clean cable, and having a technician on-site so the lighting actually works when guests arrive.
• Rental packages often include delivery, setup, and breakdown, so you don’t have to learn to focus fixtures the morning of your event.
• Technical staff can run cues and troubleshoot live, which matters most for larger parties, corporate events, or anything with a tight schedule.
• Packages can scale from a small private party to a full production, avoiding paying for more than the event needs.
If your event calls for lighting alongside sound or a DJ, our AV and sound rental packages pair well with a lighting setup, and our event staffing page covers adding a technician to run the show. For a quote tailored to your event, start with our quote page.
For technical control standards, see the ESTA DMX512-A guide. For rigging and electrical safety, consult the performing arts safety manual. For a structured learning path, review the CityTech lighting syllabus.
• Performing arts lighting guidance (UCOP)
• How to light a show (Yale College Arts)
• Recommended practice for DMX512 (ESTA)
• Performing arts safety manual (Utah Risk)
• Stage lighting syllabus (CityTech/CUNY)
Stage lighting is built around visibility, revealing form, composition, mood, and information, controlled through intensity, color, distribution, and texture. Designers combine front, side, and back angles to model performers rather than flatten them, as outlined by Yale College Arts.
The five commonly taught elements are visibility, form, composition, mood, and information, each shaped by the four controllable light properties of intensity, color, distribution, and texture. Together they determine what an audience sees and how they feel about it.
The three core lighting directions are front light, side light, and back or top light, each solving a different visibility or shaping problem. Front light makes performers visible, side light reveals shape and depth, and back light separates them from the background, a structure detailed by Yale College Arts.
At minimum, you need fixtures suited to your space (ERS units for specials, wash fixtures for general coverage), a dimmer or DMX-controlled console, DMX-rated cable, and a lighting plot to guide your hang and focus. Beginners running a small event without the time to build this themselves often turn to a rental package with delivery, setup, and on-site tech support instead.
A single DMX universe supports up to 512 addresses, which comfortably covers most small productions and events. Larger shows with many moving fixtures may need multiple universes, but a beginner setup rarely runs into that limit.