Master the wedding lighting setup process with our step-by-step guide. Transform your venue into a stunning atmosphere for your big day!
TL;DR:
• Wedding lighting transforms a venue into an atmospheric environment crucial for storytelling and guest experience.
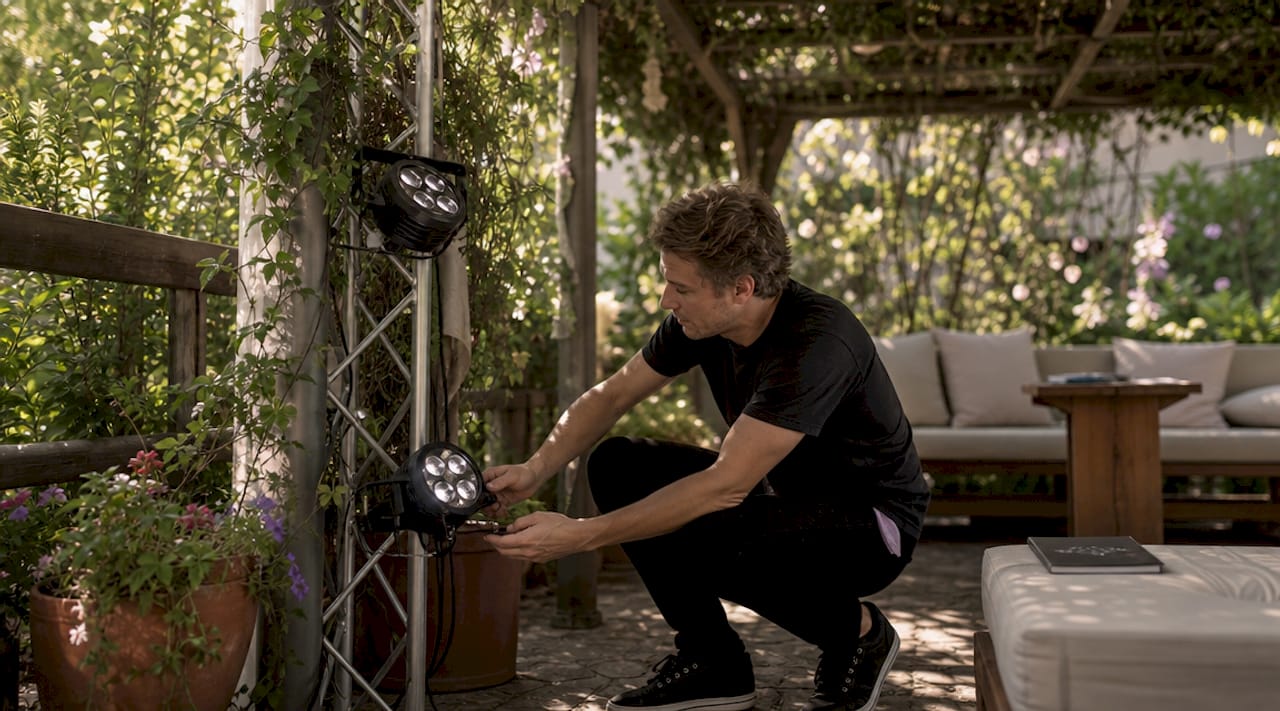
• Planning begins with a thorough venue assessment, clear zone definitions, and layered light sources to create depth and cohesiveness.
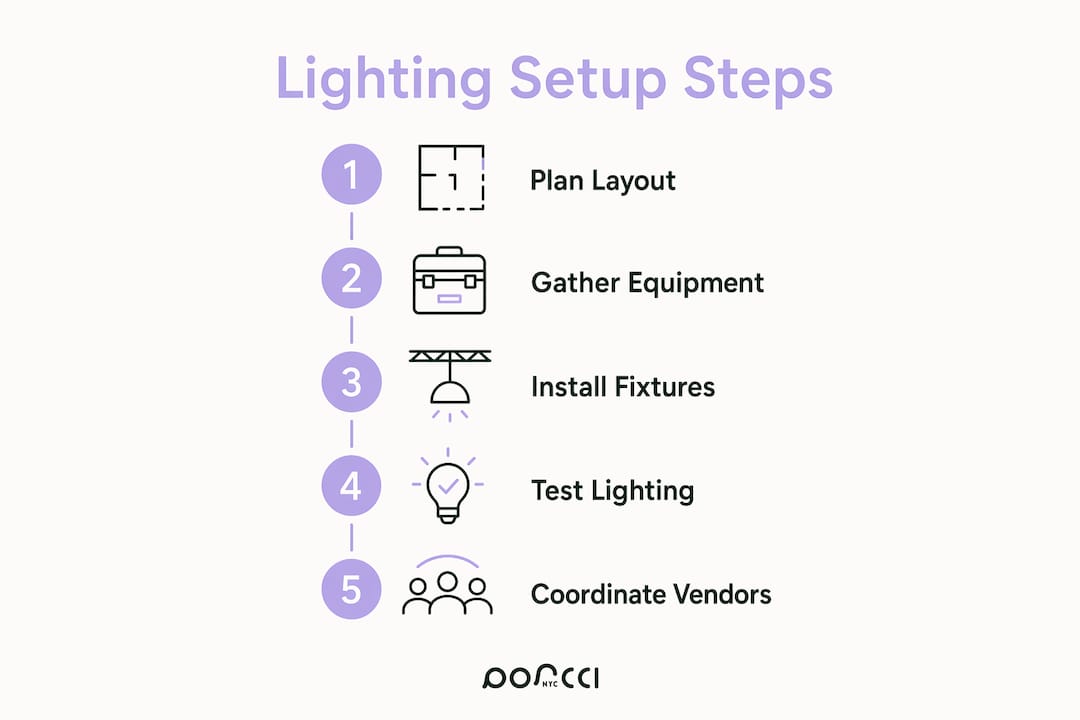
The wedding lighting setup process is a structured production workflow that transforms a raw venue into a layered, mood-driven environment tailored to every phase of your celebration. 88% of couples now prioritize atmospheric mood lighting over traditional table decor as their primary design element. That shift reflects a deeper truth: lighting is not decoration. It is the single most powerful tool you have to shape how your wedding feels, photographs, and is remembered. The industry term for this coordinated approach is event lighting design, and understanding it gives you real control over your day.
The foundation of any wedding lighting design starts with knowing your fixtures. Each type serves a specific purpose, and mixing them correctly is what separates a flat room from a stunning one.
The core fixture categories you will encounter include:
• Uplighting: Uplighting washes walls, pillars, and curtains with color, instantly adding depth and a polished feel that harsh venue overhead lights cannot replicate.
• Moving head lights: These motorized fixtures rotate and shift color to animate the dance floor. DMX-controlled moving heads can be programmed to sync with music beats, creating a curated lighting performance rather than a static display.
• Accent lights: Pinspot or focused LED fixtures highlight focal points like the sweetheart table, wedding cake, or floral centerpieces.
• Wireless LED fixtures: Battery-powered LED units eliminate cable clutter and reduce trip hazards, giving your team flexible placement options regardless of venue layout.
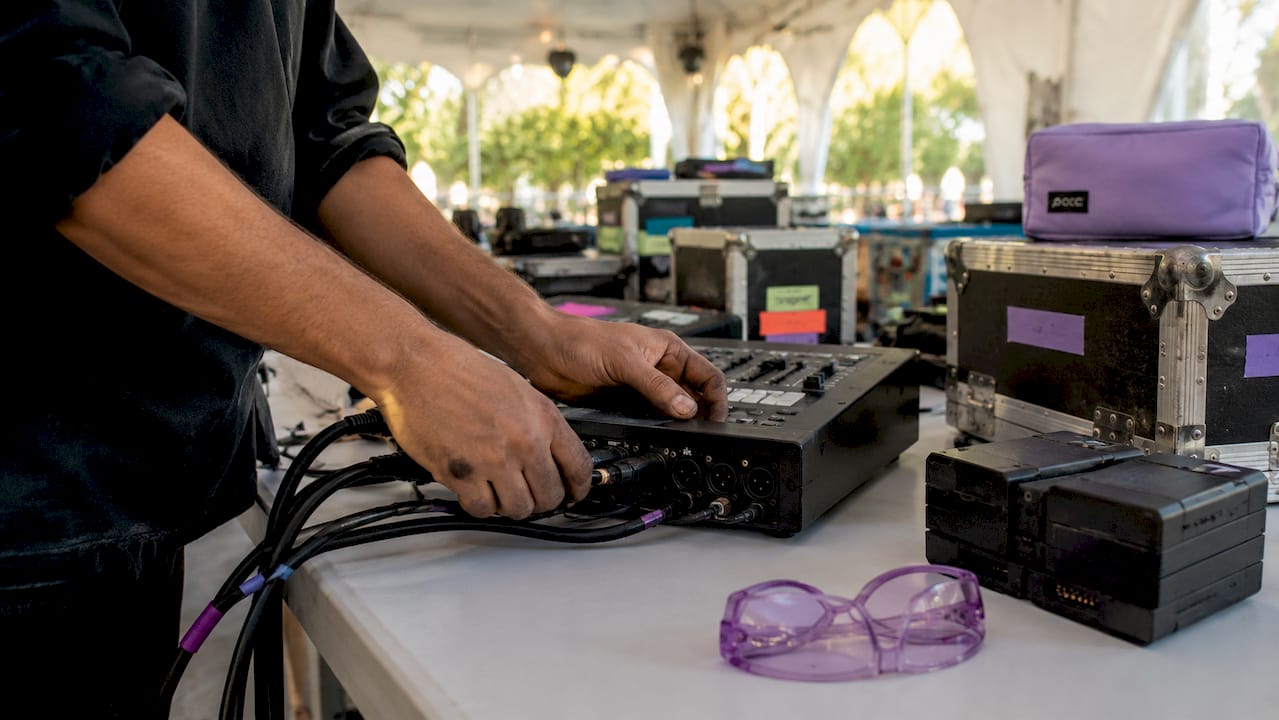
• DMX controllers: These are the brains of a professional rig, allowing one operator to program color scenes, intensity levels, and movement across every fixture simultaneously.
| Setup type | Estimated install time |
|---|---|
| Standard rig (uplighting + accents) | 60 to 90 minutes |
| Complex rig (moving heads + DMX + wireless) | 3 hours or more |
A standard professional rig takes 60 to 90 minutes to install, while complex setups require at least 3 hours. That time gap matters when you are scheduling vendor arrivals and venue access windows.
Pro Tip: Ask your lighting vendor for a fixture list before the wedding day. Knowing whether they use wireless LED units or cabled fixtures helps you anticipate cable management needs and floor plan restrictions.
Effective wedding lighting design begins with a thorough venue assessment, not a Pinterest board. Before you select a single color or fixture, you need to understand the physical space you are working with.
Work through these steps in order:
1. Assess the venue’s baseline. Note ceiling height, wall color, existing fixtures, and natural light sources. A white-walled ballroom responds to color very differently than a brick-walled loft.
2. Define your lighting zones. Divide the space into functional areas: entrance, dining area, dance floor, bar, and focal points like the head table or ceremony arch. Each zone needs its own lighting treatment.
3. Layer your light sources. Layering ambient wash, accent lighting, and decorative touches like candles creates depth and significantly improves photography. A room lit from a single source looks flat in person and worse on camera.
4. Choose colors intentionally. Warm amber and soft gold tones create intimacy during dinner. Deep blue or violet uplighting signals the transition to the dance floor. Avoid colors that clash with your floral palette or bridesmaids’ dresses.
5. Request a lighting plan or mockup. Reputable vendors use software like Vectorworks or simple floor plan sketches to show you fixture placement before the event. This step prevents surprises.
6. Build your timeline around setup. Schedule lighting installation before florists and caterers need full access to the room. Complex rigs need the space clear for at least 3 hours.
| Lighting approach | Best for | Trade-off |
|---|---|---|
| Static uplighting only | Intimate dinners, smaller venues | Limited visual energy on the dance floor |
| Moving heads + DMX | Large receptions, high-energy dance floors | Higher cost, longer setup time |
| Layered ambient + accent | All venue sizes, photography-focused couples | Requires careful color coordination |
For more venue-specific guidance, the event lighting tips resource from Porcci NYC covers how to adapt these principles to NYC and NJ spaces specifically.
Lighting does not operate in isolation. Lighting works best as a production element coordinated with your DJ, florist, and venue manager, not as a standalone rental you drop into the room. Poor coordination is the number one reason lighting setups underperform on the actual wedding day.
Here is how to keep every team member aligned:
• Confirm power availability early. Ask the venue for a circuit map and share it with your lighting vendor. Running too many fixtures on one circuit trips breakers mid-reception.
• Synchronize arrival times. Your lighting team needs to arrive before florists set centerpieces and before caterers lay linens. Establish a clear load-in order with the venue coordinator.
• Align lighting cues with music. If your DJ uses DMX-synced moving heads, they need to know your first dance song, the reception entrance track, and any key toasts in advance. Lighting cues tied to music moments feel intentional rather than accidental.
• Plan gradual dimming transitions. The 10-minute adjustment rule is standard practice: dim lights gradually over 10 minutes so guests’ eyes adapt comfortably rather than being plunged into darkness between dinner and dancing.
• Require on-site technical support. Your lighting vendor should have a technician present during the reception, not just during setup. Equipment fails, cues need adjusting, and you should not be the one troubleshooting it.
• Clarify rental responsibilities in writing. Confirm who handles breakdown, what happens if a fixture is damaged, and whether the rental fee includes the technician’s time during the event.
Pro Tip: Share your full wedding day timeline with your lighting vendor at least two weeks before the event. They can pre-program lighting scenes for each phase, from cocktail hour to last dance, so transitions happen automatically.
For a broader look at how DJ and lighting teams work together, the DJ selection guide for 2026 walks through what to look for in a vendor who coordinates well with your lighting team.
Even well-planned setups run into problems. Knowing the most common pitfalls in advance lets you address them before they affect your guests.
1. Unsafe cable placement. Cabled fixtures running across foot traffic areas create serious trip hazards. Require your vendor to use cable covers or prioritize wireless LED units in high-traffic zones.
2. Mismatched aesthetics. Choosing uplighting colors without referencing your floral palette or linen colors leads to clashes that show up clearly in photos. Share your full decor mood board with your lighting vendor at the design stage.
3. Abrupt lighting changes. Rapid dimming disorients guests and kills the mood. Lighting scenes should shift gradually over 10 to 15 minutes to pace the event experience and keep guests comfortable.
4. Insufficient setup time. Booking a complex rig but allowing only 90 minutes for installation creates rushed, error-prone work. Always build in buffer time, especially for multi-zone setups with moving heads.
5. Skipping equipment tests. Every fixture should be powered on and tested before guests arrive. Color calibration, DMX channel assignments, and wireless signal strength all need verification in the actual venue environment.
6. Ignoring daylight transitions. Outdoor ceremonies or venues with large windows require a lighting plan that accounts for the shift from afternoon daylight to evening darkness. What looks beautiful at 9 PM may be invisible at 5 PM.
“The best lighting setups we have seen are the ones where the couple treated lighting as part of the event’s story, not an afterthought. Every scene change told guests where they were in the night.”
A successful wedding lighting setup process depends on layered design, precise vendor coordination, and enough lead time to test every fixture before guests arrive.
| Point | Details |
|---|---|
| Layer your light sources | Combine ambient wash, accent lights, and decorative elements to add depth and improve photos. |
| Plan setup time accurately | Standard rigs need 60 to 90 minutes; complex DMX rigs with moving heads require at least 3 hours. |
| Coordinate vendors early | Share your timeline, decor palette, and venue power map with your lighting team weeks in advance. |
| Use gradual dimming | Shift lighting scenes over 10 to 15 minutes to keep guests comfortable during transitions. |
| Prioritize wireless fixtures | Battery-powered LED units reduce trip hazards and give your team flexible placement options. |
After working with couples across New York City and New Jersey, one pattern stands out clearly: the weddings where lighting truly shines are the ones where the couple stopped thinking of it as a rental and started treating it as a production decision.
Most couples spend months on florals and catering, then book lighting two weeks out. That order needs to flip. Lighting affects how every other design element looks, from the color of your centerpieces to the texture of your dress on camera. When you bring your lighting vendor into the conversation early, alongside your florist and DJ, the entire room becomes a coordinated environment rather than a collection of separate vendors doing their own thing.
We have also seen firsthand how dynamic lighting drives guest engagement. The data backs it up: 75% of guests feel more inclined to dance when professional, dynamic lighting replaces static overhead venue lights. That is not a small difference. It is the difference between a dance floor that fills up at 9 PM and one that stays empty until midnight.
The practical advice we give every couple is this: book a vendor who communicates in writing, provides a fixture list and floor plan, and commits to on-site support during the event. Those three things alone eliminate most of the problems we see at weddings. For additional context on how lighting fits into your broader event lighting types decision, that resource is worth reviewing before your first vendor call.
— PORCCI
Porcci NYC provides professional DJ and lighting rental services for weddings across New York City and New Jersey, with packages designed to cover everything from uplighting and moving heads to full DMX-controlled dance floor production. Every package includes delivery, setup, and on-site technical support so your focus stays on the celebration rather than the equipment.
Our team coordinates directly between your lighting rig and DJ setup to deliver synced, music-responsive lighting that matches your wedding’s energy at every phase of the night. Whether you need a clean, intimate dinner atmosphere or a high-energy reception floor, we build the package around your venue and style.
Explore our DJ and lighting services to see current packages, or request a quote for a custom setup tailored to your wedding.
A standard professional rig with uplighting and accent fixtures takes 60 to 90 minutes to install. Complex setups that include DMX controllers and moving head lights require at least 3 hours for safe, thorough installation.
The most common types include uplighting for wall color, moving head fixtures for the dance floor, pinspot accent lights for focal points like the cake table, and wireless LED units for flexible, cable-free placement throughout the venue.
Book your lighting vendor at the same time you book your DJ and florist, ideally six to twelve months before the wedding. Early booking allows time for venue walkthroughs, lighting plan mockups, and full coordination with your other vendors.
Share your full decor mood board, including floral colors, linen tones, and bridesmaids’ dress colors, with your lighting vendor during the design phase. Color-matching uplighting to your palette prevents the clashes that show up clearly in wedding photos.
Yes. A technician on-site during the event handles real-time adjustments, equipment issues, and lighting cue timing. Pre-programmed scenes help, but live events always require someone who can respond when conditions change.
Master the wedding lighting setup process with our step-by-step guide. Transform your venue into a stunning atmosphere for your big day!
TL;DR:
• Wedding lighting transforms a venue into an atmospheric environment crucial for storytelling and guest experience.
• Planning begins with a thorough venue assessment, clear zone definitions, and layered light sources to create depth and cohesiveness.
The wedding lighting setup process is a structured production workflow that transforms a raw venue into a layered, mood-driven environment tailored to every phase of your celebration. 88% of couples now prioritize atmospheric mood lighting over traditional table decor as their primary design element. That shift reflects a deeper truth: lighting is not decoration. It is the single most powerful tool you have to shape how your wedding feels, photographs, and is remembered. The industry term for this coordinated approach is event lighting design, and understanding it gives you real control over your day.
The foundation of any wedding lighting design starts with knowing your fixtures. Each type serves a specific purpose, and mixing them correctly is what separates a flat room from a stunning one.
The core fixture categories you will encounter include:
• Uplighting: Uplighting washes walls, pillars, and curtains with color, instantly adding depth and a polished feel that harsh venue overhead lights cannot replicate.
• Moving head lights: These motorized fixtures rotate and shift color to animate the dance floor. DMX-controlled moving heads can be programmed to sync with music beats, creating a curated lighting performance rather than a static display.
• Accent lights: Pinspot or focused LED fixtures highlight focal points like the sweetheart table, wedding cake, or floral centerpieces.
• Wireless LED fixtures: Battery-powered LED units eliminate cable clutter and reduce trip hazards, giving your team flexible placement options regardless of venue layout.
• DMX controllers: These are the brains of a professional rig, allowing one operator to program color scenes, intensity levels, and movement across every fixture simultaneously.
| Setup type | Estimated install time |
|---|---|
| Standard rig (uplighting + accents) | 60 to 90 minutes |
| Complex rig (moving heads + DMX + wireless) | 3 hours or more |
A standard professional rig takes 60 to 90 minutes to install, while complex setups require at least 3 hours. That time gap matters when you are scheduling vendor arrivals and venue access windows.
Pro Tip: Ask your lighting vendor for a fixture list before the wedding day. Knowing whether they use wireless LED units or cabled fixtures helps you anticipate cable management needs and floor plan restrictions.
Effective wedding lighting design begins with a thorough venue assessment, not a Pinterest board. Before you select a single color or fixture, you need to understand the physical space you are working with.
Work through these steps in order:
1. Assess the venue’s baseline. Note ceiling height, wall color, existing fixtures, and natural light sources. A white-walled ballroom responds to color very differently than a brick-walled loft.
2. Define your lighting zones. Divide the space into functional areas: entrance, dining area, dance floor, bar, and focal points like the head table or ceremony arch. Each zone needs its own lighting treatment.
3. Layer your light sources. Layering ambient wash, accent lighting, and decorative touches like candles creates depth and significantly improves photography. A room lit from a single source looks flat in person and worse on camera.
4. Choose colors intentionally. Warm amber and soft gold tones create intimacy during dinner. Deep blue or violet uplighting signals the transition to the dance floor. Avoid colors that clash with your floral palette or bridesmaids’ dresses.
5. Request a lighting plan or mockup. Reputable vendors use software like Vectorworks or simple floor plan sketches to show you fixture placement before the event. This step prevents surprises.
6. Build your timeline around setup. Schedule lighting installation before florists and caterers need full access to the room. Complex rigs need the space clear for at least 3 hours.
| Lighting approach | Best for | Trade-off |
|---|---|---|
| Static uplighting only | Intimate dinners, smaller venues | Limited visual energy on the dance floor |
| Moving heads + DMX | Large receptions, high-energy dance floors | Higher cost, longer setup time |
| Layered ambient + accent | All venue sizes, photography-focused couples | Requires careful color coordination |
For more venue-specific guidance, the event lighting tips resource from Porcci NYC covers how to adapt these principles to NYC and NJ spaces specifically.
Lighting does not operate in isolation. Lighting works best as a production element coordinated with your DJ, florist, and venue manager, not as a standalone rental you drop into the room. Poor coordination is the number one reason lighting setups underperform on the actual wedding day.
Here is how to keep every team member aligned:
• Confirm power availability early. Ask the venue for a circuit map and share it with your lighting vendor. Running too many fixtures on one circuit trips breakers mid-reception.
• Synchronize arrival times. Your lighting team needs to arrive before florists set centerpieces and before caterers lay linens. Establish a clear load-in order with the venue coordinator.
• Align lighting cues with music. If your DJ uses DMX-synced moving heads, they need to know your first dance song, the reception entrance track, and any key toasts in advance. Lighting cues tied to music moments feel intentional rather than accidental.
• Plan gradual dimming transitions. The 10-minute adjustment rule is standard practice: dim lights gradually over 10 minutes so guests’ eyes adapt comfortably rather than being plunged into darkness between dinner and dancing.
• Require on-site technical support. Your lighting vendor should have a technician present during the reception, not just during setup. Equipment fails, cues need adjusting, and you should not be the one troubleshooting it.
• Clarify rental responsibilities in writing. Confirm who handles breakdown, what happens if a fixture is damaged, and whether the rental fee includes the technician’s time during the event.
Pro Tip: Share your full wedding day timeline with your lighting vendor at least two weeks before the event. They can pre-program lighting scenes for each phase, from cocktail hour to last dance, so transitions happen automatically.
For a broader look at how DJ and lighting teams work together, the DJ selection guide for 2026 walks through what to look for in a vendor who coordinates well with your lighting team.
Even well-planned setups run into problems. Knowing the most common pitfalls in advance lets you address them before they affect your guests.
1. Unsafe cable placement. Cabled fixtures running across foot traffic areas create serious trip hazards. Require your vendor to use cable covers or prioritize wireless LED units in high-traffic zones.
2. Mismatched aesthetics. Choosing uplighting colors without referencing your floral palette or linen colors leads to clashes that show up clearly in photos. Share your full decor mood board with your lighting vendor at the design stage.
3. Abrupt lighting changes. Rapid dimming disorients guests and kills the mood. Lighting scenes should shift gradually over 10 to 15 minutes to pace the event experience and keep guests comfortable.
4. Insufficient setup time. Booking a complex rig but allowing only 90 minutes for installation creates rushed, error-prone work. Always build in buffer time, especially for multi-zone setups with moving heads.
5. Skipping equipment tests. Every fixture should be powered on and tested before guests arrive. Color calibration, DMX channel assignments, and wireless signal strength all need verification in the actual venue environment.
6. Ignoring daylight transitions. Outdoor ceremonies or venues with large windows require a lighting plan that accounts for the shift from afternoon daylight to evening darkness. What looks beautiful at 9 PM may be invisible at 5 PM.
“The best lighting setups we have seen are the ones where the couple treated lighting as part of the event’s story, not an afterthought. Every scene change told guests where they were in the night.”
A successful wedding lighting setup process depends on layered design, precise vendor coordination, and enough lead time to test every fixture before guests arrive.
| Point | Details |
|---|---|
| Layer your light sources | Combine ambient wash, accent lights, and decorative elements to add depth and improve photos. |
| Plan setup time accurately | Standard rigs need 60 to 90 minutes; complex DMX rigs with moving heads require at least 3 hours. |
| Coordinate vendors early | Share your timeline, decor palette, and venue power map with your lighting team weeks in advance. |
| Use gradual dimming | Shift lighting scenes over 10 to 15 minutes to keep guests comfortable during transitions. |
| Prioritize wireless fixtures | Battery-powered LED units reduce trip hazards and give your team flexible placement options. |
After working with couples across New York City and New Jersey, one pattern stands out clearly: the weddings where lighting truly shines are the ones where the couple stopped thinking of it as a rental and started treating it as a production decision.
Most couples spend months on florals and catering, then book lighting two weeks out. That order needs to flip. Lighting affects how every other design element looks, from the color of your centerpieces to the texture of your dress on camera. When you bring your lighting vendor into the conversation early, alongside your florist and DJ, the entire room becomes a coordinated environment rather than a collection of separate vendors doing their own thing.
We have also seen firsthand how dynamic lighting drives guest engagement. The data backs it up: 75% of guests feel more inclined to dance when professional, dynamic lighting replaces static overhead venue lights. That is not a small difference. It is the difference between a dance floor that fills up at 9 PM and one that stays empty until midnight.
The practical advice we give every couple is this: book a vendor who communicates in writing, provides a fixture list and floor plan, and commits to on-site support during the event. Those three things alone eliminate most of the problems we see at weddings. For additional context on how lighting fits into your broader event lighting types decision, that resource is worth reviewing before your first vendor call.
— PORCCI
Porcci NYC provides professional DJ and lighting rental services for weddings across New York City and New Jersey, with packages designed to cover everything from uplighting and moving heads to full DMX-controlled dance floor production. Every package includes delivery, setup, and on-site technical support so your focus stays on the celebration rather than the equipment.
Our team coordinates directly between your lighting rig and DJ setup to deliver synced, music-responsive lighting that matches your wedding’s energy at every phase of the night. Whether you need a clean, intimate dinner atmosphere or a high-energy reception floor, we build the package around your venue and style.
Explore our DJ and lighting services to see current packages, or request a quote for a custom setup tailored to your wedding.
A standard professional rig with uplighting and accent fixtures takes 60 to 90 minutes to install. Complex setups that include DMX controllers and moving head lights require at least 3 hours for safe, thorough installation.
The most common types include uplighting for wall color, moving head fixtures for the dance floor, pinspot accent lights for focal points like the cake table, and wireless LED units for flexible, cable-free placement throughout the venue.
Book your lighting vendor at the same time you book your DJ and florist, ideally six to twelve months before the wedding. Early booking allows time for venue walkthroughs, lighting plan mockups, and full coordination with your other vendors.
Share your full decor mood board, including floral colors, linen tones, and bridesmaids’ dress colors, with your lighting vendor during the design phase. Color-matching uplighting to your palette prevents the clashes that show up clearly in wedding photos.
Yes. A technician on-site during the event handles real-time adjustments, equipment issues, and lighting cue timing. Pre-programmed scenes help, but live events always require someone who can respond when conditions change.