
Master the art of coordinating party vendors with our detailed, seven-step guide to ensure a seamless event experience.
Coordinating party vendors comes down to seven repeatable steps: source and vet, contract and pay, build a master document, create vendor-specific timelines, draft a day-of run sheet and floor plan, manage technical logistics, and close out with contingency plans. You can own this process yourself with a spreadsheet and a cloud folder, or you can hand it to a day-of coordinator. As a rule of thumb, hire help when you have more than six vendors, a venue with strict load-in rules, or less than three months to plan. According to Sortra’s vendor coordination guide, the structure itself, not a planner’s presence, is what keeps events on track.
The seven core steps at a glance:
• Source and vet vendors (referrals, portfolios, insurance checks)
• Sign contracts with clear deliverables, payment milestones, and cancellation terms
• Build one master vendor document with every contact, arrival window, and payment status
• Send each vendor a filtered timeline showing only their relevant items
• Create a minute-by-minute day-of run sheet tied to a labeled floor plan
• Confirm technical logistics: power, load-in windows, AV specs, and delivery staging
• Execute contingency plans and close out with final payments, returns, and reviews
Pro Tip: The single most impactful habit in vendor coordination is the documented, timestamped handoff. Every confirmation, change, and approval should exist in writing with a date and time. That paper trail resolves disputes before they escalate.
Coordinating party vendors reliably requires a master document, vendor-specific timelines, a minute-by-minute run sheet, and one designated point person who owns all vendor communication on event day.
| Point | Details |
|---|---|
| Start sourcing early | Book venue, caterer, and photographer 9–12 months out; entertainers and rentals 3–6 months out. |
| Contracts protect you | Every vendor agreement needs deliverables, cancellation terms, and a payment schedule in writing. |
| One master document | Track every vendor’s contact, arrival window, power needs, and payment status in a single shared file. |
| Filtered timelines reduce confusion | Send each vendor only their relevant schedule items and request a written confirmation reply. |
| Porcci NYC for entertainment and AV | Porcci NYC delivers, sets up, and follows your run sheet for DJ, AV, photo booth, and karaoke needs across NYC and NJ. |
• When should you start coordinating vendors?
• How do you find and vet the right vendors?
• What belongs in every vendor contract?
• How do you build a master vendor document?
• How do you build a day-of run sheet and floor plan?
• What technical logistics do you need to confirm?
• How do you run on-site check-ins and vendor walkthroughs?
• What do you do when a vendor fails on event day?
• What happens after the event?
• How do documented digital handoffs reduce coordination risk?
• How do you handle vendor disputes or misunderstandings on event day?
• What we’ve learned about coordination that most guides skip
• Porcci NYC handles the entertainment and AV side so you can focus on the rest
• Sources
• FAQ
Start sourcing your anchor vendors (venue, caterer, photographer) 9–12 months out for weddings and large events. For private parties, 3–6 months is workable. The tighter the timeline, the less negotiating leverage you have on price and availability.
1. 9–12 months out: Book venue, caterer, and photographer. These vendors fill fastest and set the parameters every other vendor works around.
2. 3–6 months out: Confirm entertainment (DJ, band, photo booth), florist, and any specialty rentals. Pay deposits and collect certificates of insurance.
3. 1 month out: Finalize menus, AV specs, and floor plans. Confirm all permits and noise curfew rules with your venue or municipality.
4. 1–2 weeks out: Send each vendor their filtered timeline and a vendor packet with parking, load-in instructions, and your day-of contact number.
5. 48–24 hours out: Send a short day-before confirmation message. Per EventRundown’s scheduling guide, this message should include arrival time, address, parking details, the day-of contact, and a link to their timeline. Request a reply to confirm.
6. Day of: Run against the minute-by-minute schedule. Check off setup-complete timestamps as each vendor finishes.
Caterers and venues need the longest lead time because their capacity is fixed. Entertainers and rental companies (DJs, photo booths, AV gear) typically book 2–4 months out. Day-of staff, florists, and décor extras can often be confirmed 4–6 weeks before the event.
Referrals from your venue coordinator are the highest-signal source. Venues work with vendors repeatedly and will not recommend someone who creates problems. Beyond that, local event directories, Instagram portfolios, and Google reviews with photos give you a realistic picture of quality. Local vendors also offer faster on-site problem resolution when something goes sideways on event day.
A professional, prepared first impression in your outreach sets the tone for the entire relationship, according to Harvard Business Review’s research on first impressions. Come to every vendor call with these questions:
• Are you available on our date, and do you have other events that day?
• What does your setup require (power, space, access time)?
• Who is your backup if you or a key staff member cannot make it?
• Can you provide a certificate of insurance and two references?
• What does your standard contract include, and what triggers a cancellation fee?
Red flags to walk away from: vague or verbal-only pricing, refusal to provide a written contract, slow replies during the booking process, and no verifiable references. Experienced planners treat slow communication before the event as a preview of slow communication on event day.
Pro Tip: Spend 15 minutes on due diligence before signing: search the vendor’s name plus “reviews” and “complaints,” check their business license if your state requires one, and call one reference. This takes less time than resolving a day-of failure.
A signed contract is your only real leverage if a vendor underdelivers. Every agreement should include:
• Deliverables: Exactly what the vendor provides, including quantities, hours, and staffing levels.
• Dates and times: Setup window, service start, service end, and teardown deadline.
• Cancellation and overtime clauses: Who pays what if the event runs long or a vendor cancels within 30 days.
• Substitution policy: Whether the vendor can send a substitute and under what conditions you approve one.
• Force majeure: How weather, illness, or venue closure is handled.
• Image rights: For photographers and videographers, who owns the files and when you receive them.
For payment structure, a standard approach is 25–50% deposit at signing to hold the date, with the balance due 7–14 days before the event or immediately after service delivery. Holding a small retainer until after the event gives you leverage for minor disputes. Review the Porcci NYC vendor contract guide for sample clause language you can adapt.
On insurance and permits: Request a Certificate of Insurance (COI) from any vendor who brings equipment or staff onto your venue. Many venues require vendors to carry a minimum liability amount. Check with your venue coordinator and local municipality for noise curfews, outdoor event permits, and alcohol service licenses before you finalize your vendor list.
When you confirm everything in writing and build a vendor status tracker that maps each vendor from “contacted” to “fully paid,” you close the gaps where most coordination failures happen, as Abastio’s vendor management guide notes.
Pro Tip: Never release final payment until you have verified that all deliverables were met. A short post-event checklist, signed off by your point person, protects you and gives vendors a clear standard to meet.
A single master document is the backbone of coordinating multiple vendors without confusion. Per Sortra’s wedding vendor management guide, your tracker should include contact details, contract terms, deposit and payment dates, and status labels.

Here is a minimal structure for each vendor row:
| Field | What to include |
|---|---|
| Vendor name and category | “DJ — Main Entertainment” |
| Primary contact and backup | Name, cell, email |
| Arrival / departure window | “4:00 PM setup, 11:30 PM breakdown” |
| Equipment and power needs | “2× 20A circuits, 10×10 ft stage” |
| Access point | “Loading dock, south entrance” |
| Payment status | “Deposit paid; balance due Nov 1” |
| Contract location | Link to cloud folder |
Store all contracts, floor plans, and run sheets in one shared cloud folder (Google Drive or Dropbox work well). Use a single official email address for all vendor correspondence so nothing gets lost in personal inboxes.
In the two weeks before the event, review the document daily: confirm payment statuses, update arrival windows if the schedule shifts, and flag any vendor who has not replied to your last message.
Pro Tip: Send each vendor a short reply template: “Please reply YES to confirm you have received this timeline and will arrive at [time].” A one-word reply is easy to send and gives you a timestamped confirmation you can reference if a vendor claims they never got the details.
Showing each vendor only their relevant timeline items prevents confusion and keeps setups on schedule, as EventRundown’s guide confirms. Export a filtered view for each vendor and include it in their packet.
Every row in your run sheet should answer five questions: What time? What happens? Who owns it? Where? And is it verified?
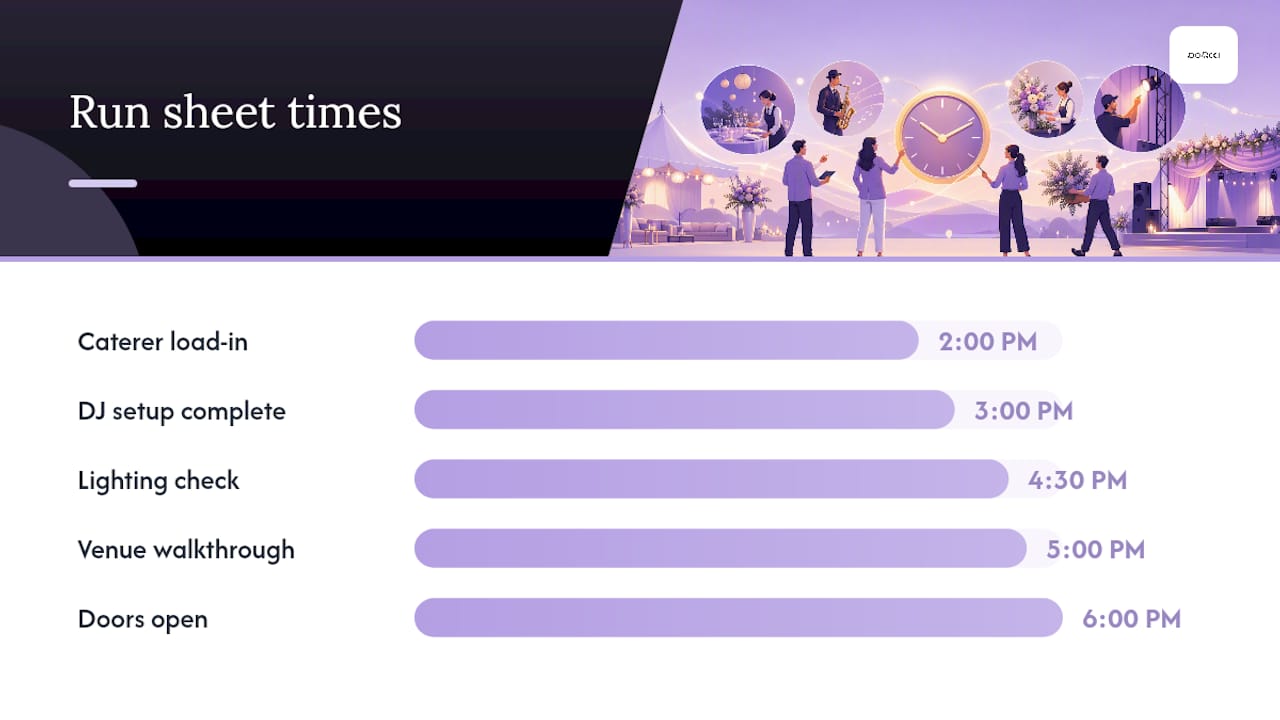
| Time | Item | Owner | Location | Verified |
|---|---|---|---|---|
| 2:00 PM | Caterer load-in begins | Caterer + point person | Kitchen entrance | ☐ |
| 3:00 PM | DJ setup complete | DJ | Main stage | ☐ |
| 4:30 PM | Lighting check | AV tech | Full room | ☐ |
| 5:00 PM | Venue walkthrough | Point person | All areas | ☐ |
| 6:00 PM | Doors open | Point person | Main entrance | ☐ |
Stagger load-in windows by at least 30–45 minutes per vendor to avoid logjams at the loading dock. Vendor coordination guides recommend building buffer time into transitions and scheduling “setup complete” checkpoints so problems surface with time to fix them, per EventRundown.
Your floor plan should label: load-in entrance and dock, staging areas for each vendor, power outlet locations, speaker and lighting positions, vendor parking, and vendor meal or break areas. Share it with every vendor before the event and confirm they have reviewed it.
Before releasing vendors from setup: Walk the full floor plan with your point person and verify that every labeled position matches the run sheet. A 10-minute walkthrough at this stage catches 80% of day-of surprises before guests arrive.
For entertainment setup specifics in NYC and NJ, the Porcci NYC entertainment setup guide covers AV positioning and power requirements in detail.
Technical gaps are the most common source of day-of delays. Work through this checklist with your venue contact at least two weeks before the event:
• Power: Confirm total amperage available and identify dedicated circuits for AV, catering, and lighting. Most DJ setups require at least two 20A circuits.
• Loading dock: Note hours, elevator dimensions, and any stair restrictions that affect large equipment.
• Cable runs: Confirm where cables can be routed safely and whether the venue requires cable covers for guest walkways.
• Wireless spectrum: If you are using wireless microphones and the venue has strong Wi-Fi, coordinate frequencies to avoid interference.
• Delivery windows: Assign a specific time slot and a named staff member to sign for each delivery.
• Vendor parking: Confirm where vendors can park during load-in and whether they need a pass.
Event logistics coordinators manage vendor logistics including load-in schedules, equipment, venue layouts, and post-event analysis to improve future events, per Cvent’s event logistics guide. If you are self-coordinating, this checklist is your substitute for that role.
Pro Tip: Ask your venue for a technical spec sheet before your first vendor call. Knowing the exact power capacity and loading dock dimensions lets you filter out vendors whose equipment requirements exceed what the space can support.
For final guest counts that affect catering quantities and rental numbers, review your RSVP management process at least two weeks out.
Assign these roles before event day, not on it:
• Primary point person: The single contact all vendors call or text. This person does not leave the venue.
• Vendor greeter: Meets each vendor at the load-in entrance and walks them to their setup area.
• AV tech lead: Owns all sound, lighting, and microphone checks.
• Payments and tips manager: Holds envelopes with final payments and tips, releases them after service verification.
Schedule a brief walkthrough after major setups are complete, typically 60–90 minutes before doors open. Walk the room in the order guests will experience it: entrance, cocktail area, main room, stage, restrooms. Confirm that every vendor’s setup matches the floor plan and run sheet.
A short rehearsal for key cues saves the most time: Run the ceremony processional or the first AV cue once with the relevant vendors present. A 5-minute rehearsal of the DJ’s intro sequence or the lighting transition at dinner service eliminates the most common timing errors.
For detailed day-of workflows and role assignments, the Porcci NYC event day coordination guide covers the full sequence.
Pro Tip: Ask each vendor to send you a “setup complete” text with a photo when they finish. Timestamped photos are your fastest verification tool and your best documentation if a dispute arises later.
Most complex event failures happen in the gaps between vendors, where responsibilities and timing are unclear. Proactive documentation closes most of those gaps before they open. When something does go wrong, work through this decision tree:
Vendor arrives late:
• Call the primary contact immediately. If no answer within 10 minutes, call the backup contact.
• Notify your point person and adjust the run sheet to absorb the delay.
• Document the arrival time with a timestamped note.
Equipment is missing or damaged:
• Confirm what was contracted versus what arrived.
• Ask the vendor to source a replacement within 30 minutes. If they cannot, escalate to your backup vendor list.
Power outage or AV failure:
• Contact venue technical staff first. Most outages are circuit-level and reset quickly.
• Switch to a backup playlist on a phone or laptop while the issue is resolved.
Staff no-show:
• Ask the vendor to send a replacement. If they refuse or cannot, document the shortfall and withhold the proportional payment amount.
On accepting on-site fixes: Accept a reasonable fix if it solves the problem for guests. Reserve contract enforcement, such as partial refunds or dispute letters, for after the event when you have full documentation. Arguing during the event costs you more in stress and distraction than the fix is worth.
• Keep a short incident log: vendor name, time, issue, resolution, and who was notified.
• Never release final payment for a vendor who did not fulfill their contract until you have reviewed the documentation.
Local vendors tend to resolve on-site problems faster because they can dispatch replacements or additional equipment without long transit times.
• Verify all deliverables against the contract before releasing final payment.
• Confirm rental equipment quantities match the pickup manifest before the vendor loads out.
• Authorize teardown only after your point person has signed off on the floor plan reset.
• Release tips in labeled envelopes after service is complete.
1. Write brief performance notes for each vendor within 48 hours while details are fresh.
2. Post honest reviews on Google and The Knot (for wedding vendors) to help other planners.
3. Archive contracts, invoices, setup photos, and incident notes in a single labeled folder.
4. Note lessons learned: which vendors arrived early, which needed extra follow-up, and what you would change in the run sheet.
This archive becomes your vendor shortlist for the next event and your documentation if a payment dispute surfaces later.
Moving from informal group texts to documented, timestamped digital handoffs reduces operational risk significantly. The Event Safety Alliance advocates this shift specifically to prevent failures that occur when verbal agreements are misremembered or disputed.
Three templates every coordinator should have:
• Day-before confirmation message: Arrival time, address, parking/loading details, day-of contact name and number, and a link to the vendor’s filtered timeline. End with “Please reply YES to confirm.”
• Vendor-specific timeline view: A filtered export from your master document showing only that vendor’s items, times, and location assignments.
• Vendor packet checklist: Contract copy, floor plan, run sheet excerpt, payment schedule, and emergency contact list.
For tools, a spreadsheet plus a shared cloud folder handles most private parties cleanly. Google Sheets for the master tracker, Google Drive for documents, and Gmail for the official communication channel is a free, reliable stack. For larger events or weddings, dedicated platforms like Airtable or HoneyBook add automation and client-facing portals.
Pro Tip: Label every file with the event date and vendor name (e.g., “2026-09-14_DJ_Timeline.pdf”). When you are searching for a document at 5:00 PM on event day, consistent naming saves real minutes.
Stay calm, stay factual, and stay private. Pull the vendor aside rather than addressing a problem in front of guests. Reference the contract and run sheet specifically: “The contract states setup completes by 4:00 PM. It is now 4:45 PM. What do you need from me to finish in the next 15 minutes?” Specific, documented language moves conversations toward solutions faster than general frustration.
If a vendor disputes what was agreed, pull up the written confirmation on your phone. This is why every agreement lives in writing. For misunderstandings about scope (a caterer who did not know they were responsible for clearing tables, for example), make a quick decision that serves guests and document the gap for post-event follow-up. Withhold the disputed portion of payment, note the shortfall in writing, and resolve it after the event when both parties are calm.
Never let a vendor dispute pull your attention away from the event for more than a few minutes. Assign it to your point person if needed and return to the floor.
The most underrated coordination skill is not the checklist. It is the decision to assign a single point of contact and protect that person’s attention ruthlessly. Every vendor coordination system described above, from filtered timelines to timestamped handoffs, works only if one person owns the information and is reachable throughout the event.
We see hosts build excellent master documents and then undermine them by having three people answer vendor questions on event day. Vendors get conflicting answers, make independent decisions, and the run sheet falls apart. The document is not the system. The person who enforces it is.
Hiring a day-of coordinator is worth the cost when you have more than six vendors, a venue with strict technical requirements, or a personal stake in the event (it is hard to enforce a run sheet at your own wedding). A coordinator costs less than the catering overage you will approve under stress without one.
When your vendor list includes DJ services, photo booths, AV equipment, or karaoke, Porcci NYC delivers, sets up, and breaks down everything according to your run sheet. You share the timeline and floor plan; we handle the technical execution. That means one fewer vendor to chase on event day and a setup that arrives on time, tested, and ready.
Porcci NYC serves events across NYC and New Jersey, from intimate private parties to large weddings and corporate events. Services include DJ services, AV and sound system rentals, photo booths, karaoke systems, professional lighting, and event staffing with full setup and breakdown included.
Ready to lock in your entertainment and AV? Request a quote and we will confirm availability, walk through your run sheet requirements, and send a package that fits your timeline and budget.
• Event logistics: how to plan event logistics (Cvent blog)
• How to keep event vendors on schedule | EventRundown
• How to coordinate vendors without a planner (Sortra)
• How to make a great first impression | Harvard Business Review
Build a master document with every vendor’s contact, arrival window, and payment status, then send each vendor a filtered timeline showing only their items. Confirm everything in writing and assign one point person to handle all vendor communication on event day.
Definitions vary across planning frameworks. A common version covers concept, coordination, control, culmination, and closeout, though different sources use slightly different terms. The core idea is that a successful event moves through planning, execution, and wrap-up as distinct phases.
Professional, specific outreach increases response quality and trust, per Harvard Business Review’s research on first impressions. Provide vendors with a clear event brief, a realistic budget range, and a timeline upfront so they can assess fit quickly.
Vendors typically do not appear on the guest seating chart, but they do need a designated vendor meal area and break space noted on the floor plan. Include vendor meal timing in the run sheet so catering staff know when and where to serve them.
Master the art of coordinating party vendors with our detailed, seven-step guide to ensure a seamless event experience.
Coordinating party vendors comes down to seven repeatable steps: source and vet, contract and pay, build a master document, create vendor-specific timelines, draft a day-of run sheet and floor plan, manage technical logistics, and close out with contingency plans. You can own this process yourself with a spreadsheet and a cloud folder, or you can hand it to a day-of coordinator. As a rule of thumb, hire help when you have more than six vendors, a venue with strict load-in rules, or less than three months to plan. According to Sortra’s vendor coordination guide, the structure itself, not a planner’s presence, is what keeps events on track.
The seven core steps at a glance:
• Source and vet vendors (referrals, portfolios, insurance checks)
• Sign contracts with clear deliverables, payment milestones, and cancellation terms
• Build one master vendor document with every contact, arrival window, and payment status
• Send each vendor a filtered timeline showing only their relevant items
• Create a minute-by-minute day-of run sheet tied to a labeled floor plan
• Confirm technical logistics: power, load-in windows, AV specs, and delivery staging
• Execute contingency plans and close out with final payments, returns, and reviews
Pro Tip: The single most impactful habit in vendor coordination is the documented, timestamped handoff. Every confirmation, change, and approval should exist in writing with a date and time. That paper trail resolves disputes before they escalate.
Coordinating party vendors reliably requires a master document, vendor-specific timelines, a minute-by-minute run sheet, and one designated point person who owns all vendor communication on event day.
| Point | Details |
|---|---|
| Start sourcing early | Book venue, caterer, and photographer 9–12 months out; entertainers and rentals 3–6 months out. |
| Contracts protect you | Every vendor agreement needs deliverables, cancellation terms, and a payment schedule in writing. |
| One master document | Track every vendor’s contact, arrival window, power needs, and payment status in a single shared file. |
| Filtered timelines reduce confusion | Send each vendor only their relevant schedule items and request a written confirmation reply. |
| Porcci NYC for entertainment and AV | Porcci NYC delivers, sets up, and follows your run sheet for DJ, AV, photo booth, and karaoke needs across NYC and NJ. |
• When should you start coordinating vendors?
• How do you find and vet the right vendors?
• What belongs in every vendor contract?
• How do you build a master vendor document?
• How do you build a day-of run sheet and floor plan?
• What technical logistics do you need to confirm?
• How do you run on-site check-ins and vendor walkthroughs?
• What do you do when a vendor fails on event day?
• What happens after the event?
• How do documented digital handoffs reduce coordination risk?
• How do you handle vendor disputes or misunderstandings on event day?
• What we’ve learned about coordination that most guides skip
• Porcci NYC handles the entertainment and AV side so you can focus on the rest
• Sources
• FAQ
Start sourcing your anchor vendors (venue, caterer, photographer) 9–12 months out for weddings and large events. For private parties, 3–6 months is workable. The tighter the timeline, the less negotiating leverage you have on price and availability.
1. 9–12 months out: Book venue, caterer, and photographer. These vendors fill fastest and set the parameters every other vendor works around.
2. 3–6 months out: Confirm entertainment (DJ, band, photo booth), florist, and any specialty rentals. Pay deposits and collect certificates of insurance.
3. 1 month out: Finalize menus, AV specs, and floor plans. Confirm all permits and noise curfew rules with your venue or municipality.
4. 1–2 weeks out: Send each vendor their filtered timeline and a vendor packet with parking, load-in instructions, and your day-of contact number.
5. 48–24 hours out: Send a short day-before confirmation message. Per EventRundown’s scheduling guide, this message should include arrival time, address, parking details, the day-of contact, and a link to their timeline. Request a reply to confirm.
6. Day of: Run against the minute-by-minute schedule. Check off setup-complete timestamps as each vendor finishes.
Caterers and venues need the longest lead time because their capacity is fixed. Entertainers and rental companies (DJs, photo booths, AV gear) typically book 2–4 months out. Day-of staff, florists, and décor extras can often be confirmed 4–6 weeks before the event.
Referrals from your venue coordinator are the highest-signal source. Venues work with vendors repeatedly and will not recommend someone who creates problems. Beyond that, local event directories, Instagram portfolios, and Google reviews with photos give you a realistic picture of quality. Local vendors also offer faster on-site problem resolution when something goes sideways on event day.
A professional, prepared first impression in your outreach sets the tone for the entire relationship, according to Harvard Business Review’s research on first impressions. Come to every vendor call with these questions:
• Are you available on our date, and do you have other events that day?
• What does your setup require (power, space, access time)?
• Who is your backup if you or a key staff member cannot make it?
• Can you provide a certificate of insurance and two references?
• What does your standard contract include, and what triggers a cancellation fee?
Red flags to walk away from: vague or verbal-only pricing, refusal to provide a written contract, slow replies during the booking process, and no verifiable references. Experienced planners treat slow communication before the event as a preview of slow communication on event day.
Pro Tip: Spend 15 minutes on due diligence before signing: search the vendor’s name plus “reviews” and “complaints,” check their business license if your state requires one, and call one reference. This takes less time than resolving a day-of failure.
A signed contract is your only real leverage if a vendor underdelivers. Every agreement should include:
• Deliverables: Exactly what the vendor provides, including quantities, hours, and staffing levels.
• Dates and times: Setup window, service start, service end, and teardown deadline.
• Cancellation and overtime clauses: Who pays what if the event runs long or a vendor cancels within 30 days.
• Substitution policy: Whether the vendor can send a substitute and under what conditions you approve one.
• Force majeure: How weather, illness, or venue closure is handled.
• Image rights: For photographers and videographers, who owns the files and when you receive them.
For payment structure, a standard approach is 25–50% deposit at signing to hold the date, with the balance due 7–14 days before the event or immediately after service delivery. Holding a small retainer until after the event gives you leverage for minor disputes. Review the Porcci NYC vendor contract guide for sample clause language you can adapt.
On insurance and permits: Request a Certificate of Insurance (COI) from any vendor who brings equipment or staff onto your venue. Many venues require vendors to carry a minimum liability amount. Check with your venue coordinator and local municipality for noise curfews, outdoor event permits, and alcohol service licenses before you finalize your vendor list.
When you confirm everything in writing and build a vendor status tracker that maps each vendor from “contacted” to “fully paid,” you close the gaps where most coordination failures happen, as Abastio’s vendor management guide notes.
Pro Tip: Never release final payment until you have verified that all deliverables were met. A short post-event checklist, signed off by your point person, protects you and gives vendors a clear standard to meet.
A single master document is the backbone of coordinating multiple vendors without confusion. Per Sortra’s wedding vendor management guide, your tracker should include contact details, contract terms, deposit and payment dates, and status labels.
Here is a minimal structure for each vendor row:
| Field | What to include |
|---|---|
| Vendor name and category | “DJ — Main Entertainment” |
| Primary contact and backup | Name, cell, email |
| Arrival / departure window | “4:00 PM setup, 11:30 PM breakdown” |
| Equipment and power needs | “2× 20A circuits, 10×10 ft stage” |
| Access point | “Loading dock, south entrance” |
| Payment status | “Deposit paid; balance due Nov 1” |
| Contract location | Link to cloud folder |
Store all contracts, floor plans, and run sheets in one shared cloud folder (Google Drive or Dropbox work well). Use a single official email address for all vendor correspondence so nothing gets lost in personal inboxes.
In the two weeks before the event, review the document daily: confirm payment statuses, update arrival windows if the schedule shifts, and flag any vendor who has not replied to your last message.
Pro Tip: Send each vendor a short reply template: “Please reply YES to confirm you have received this timeline and will arrive at [time].” A one-word reply is easy to send and gives you a timestamped confirmation you can reference if a vendor claims they never got the details.
Showing each vendor only their relevant timeline items prevents confusion and keeps setups on schedule, as EventRundown’s guide confirms. Export a filtered view for each vendor and include it in their packet.
Every row in your run sheet should answer five questions: What time? What happens? Who owns it? Where? And is it verified?
| Time | Item | Owner | Location | Verified |
|---|---|---|---|---|
| 2:00 PM | Caterer load-in begins | Caterer + point person | Kitchen entrance | ☐ |
| 3:00 PM | DJ setup complete | DJ | Main stage | ☐ |
| 4:30 PM | Lighting check | AV tech | Full room | ☐ |
| 5:00 PM | Venue walkthrough | Point person | All areas | ☐ |
| 6:00 PM | Doors open | Point person | Main entrance | ☐ |
Stagger load-in windows by at least 30–45 minutes per vendor to avoid logjams at the loading dock. Vendor coordination guides recommend building buffer time into transitions and scheduling “setup complete” checkpoints so problems surface with time to fix them, per EventRundown.
Your floor plan should label: load-in entrance and dock, staging areas for each vendor, power outlet locations, speaker and lighting positions, vendor parking, and vendor meal or break areas. Share it with every vendor before the event and confirm they have reviewed it.
Before releasing vendors from setup: Walk the full floor plan with your point person and verify that every labeled position matches the run sheet. A 10-minute walkthrough at this stage catches 80% of day-of surprises before guests arrive.
For entertainment setup specifics in NYC and NJ, the Porcci NYC entertainment setup guide covers AV positioning and power requirements in detail.
Technical gaps are the most common source of day-of delays. Work through this checklist with your venue contact at least two weeks before the event:
• Power: Confirm total amperage available and identify dedicated circuits for AV, catering, and lighting. Most DJ setups require at least two 20A circuits.
• Loading dock: Note hours, elevator dimensions, and any stair restrictions that affect large equipment.
• Cable runs: Confirm where cables can be routed safely and whether the venue requires cable covers for guest walkways.
• Wireless spectrum: If you are using wireless microphones and the venue has strong Wi-Fi, coordinate frequencies to avoid interference.
• Delivery windows: Assign a specific time slot and a named staff member to sign for each delivery.
• Vendor parking: Confirm where vendors can park during load-in and whether they need a pass.
Event logistics coordinators manage vendor logistics including load-in schedules, equipment, venue layouts, and post-event analysis to improve future events, per Cvent’s event logistics guide. If you are self-coordinating, this checklist is your substitute for that role.
Pro Tip: Ask your venue for a technical spec sheet before your first vendor call. Knowing the exact power capacity and loading dock dimensions lets you filter out vendors whose equipment requirements exceed what the space can support.
For final guest counts that affect catering quantities and rental numbers, review your RSVP management process at least two weeks out.
Assign these roles before event day, not on it:
• Primary point person: The single contact all vendors call or text. This person does not leave the venue.
• Vendor greeter: Meets each vendor at the load-in entrance and walks them to their setup area.
• AV tech lead: Owns all sound, lighting, and microphone checks.
• Payments and tips manager: Holds envelopes with final payments and tips, releases them after service verification.
Schedule a brief walkthrough after major setups are complete, typically 60–90 minutes before doors open. Walk the room in the order guests will experience it: entrance, cocktail area, main room, stage, restrooms. Confirm that every vendor’s setup matches the floor plan and run sheet.
A short rehearsal for key cues saves the most time: Run the ceremony processional or the first AV cue once with the relevant vendors present. A 5-minute rehearsal of the DJ’s intro sequence or the lighting transition at dinner service eliminates the most common timing errors.
For detailed day-of workflows and role assignments, the Porcci NYC event day coordination guide covers the full sequence.
Pro Tip: Ask each vendor to send you a “setup complete” text with a photo when they finish. Timestamped photos are your fastest verification tool and your best documentation if a dispute arises later.
Most complex event failures happen in the gaps between vendors, where responsibilities and timing are unclear. Proactive documentation closes most of those gaps before they open. When something does go wrong, work through this decision tree:
Vendor arrives late:
• Call the primary contact immediately. If no answer within 10 minutes, call the backup contact.
• Notify your point person and adjust the run sheet to absorb the delay.
• Document the arrival time with a timestamped note.
Equipment is missing or damaged:
• Confirm what was contracted versus what arrived.
• Ask the vendor to source a replacement within 30 minutes. If they cannot, escalate to your backup vendor list.
Power outage or AV failure:
• Contact venue technical staff first. Most outages are circuit-level and reset quickly.
• Switch to a backup playlist on a phone or laptop while the issue is resolved.
Staff no-show:
• Ask the vendor to send a replacement. If they refuse or cannot, document the shortfall and withhold the proportional payment amount.
On accepting on-site fixes: Accept a reasonable fix if it solves the problem for guests. Reserve contract enforcement, such as partial refunds or dispute letters, for after the event when you have full documentation. Arguing during the event costs you more in stress and distraction than the fix is worth.
• Keep a short incident log: vendor name, time, issue, resolution, and who was notified.
• Never release final payment for a vendor who did not fulfill their contract until you have reviewed the documentation.
Local vendors tend to resolve on-site problems faster because they can dispatch replacements or additional equipment without long transit times.
• Verify all deliverables against the contract before releasing final payment.
• Confirm rental equipment quantities match the pickup manifest before the vendor loads out.
• Authorize teardown only after your point person has signed off on the floor plan reset.
• Release tips in labeled envelopes after service is complete.
1. Write brief performance notes for each vendor within 48 hours while details are fresh.
2. Post honest reviews on Google and The Knot (for wedding vendors) to help other planners.
3. Archive contracts, invoices, setup photos, and incident notes in a single labeled folder.
4. Note lessons learned: which vendors arrived early, which needed extra follow-up, and what you would change in the run sheet.
This archive becomes your vendor shortlist for the next event and your documentation if a payment dispute surfaces later.
Moving from informal group texts to documented, timestamped digital handoffs reduces operational risk significantly. The Event Safety Alliance advocates this shift specifically to prevent failures that occur when verbal agreements are misremembered or disputed.
Three templates every coordinator should have:
• Day-before confirmation message: Arrival time, address, parking/loading details, day-of contact name and number, and a link to the vendor’s filtered timeline. End with “Please reply YES to confirm.”
• Vendor-specific timeline view: A filtered export from your master document showing only that vendor’s items, times, and location assignments.
• Vendor packet checklist: Contract copy, floor plan, run sheet excerpt, payment schedule, and emergency contact list.
For tools, a spreadsheet plus a shared cloud folder handles most private parties cleanly. Google Sheets for the master tracker, Google Drive for documents, and Gmail for the official communication channel is a free, reliable stack. For larger events or weddings, dedicated platforms like Airtable or HoneyBook add automation and client-facing portals.
Pro Tip: Label every file with the event date and vendor name (e.g., “2026-09-14_DJ_Timeline.pdf”). When you are searching for a document at 5:00 PM on event day, consistent naming saves real minutes.
Stay calm, stay factual, and stay private. Pull the vendor aside rather than addressing a problem in front of guests. Reference the contract and run sheet specifically: “The contract states setup completes by 4:00 PM. It is now 4:45 PM. What do you need from me to finish in the next 15 minutes?” Specific, documented language moves conversations toward solutions faster than general frustration.
If a vendor disputes what was agreed, pull up the written confirmation on your phone. This is why every agreement lives in writing. For misunderstandings about scope (a caterer who did not know they were responsible for clearing tables, for example), make a quick decision that serves guests and document the gap for post-event follow-up. Withhold the disputed portion of payment, note the shortfall in writing, and resolve it after the event when both parties are calm.
Never let a vendor dispute pull your attention away from the event for more than a few minutes. Assign it to your point person if needed and return to the floor.
The most underrated coordination skill is not the checklist. It is the decision to assign a single point of contact and protect that person’s attention ruthlessly. Every vendor coordination system described above, from filtered timelines to timestamped handoffs, works only if one person owns the information and is reachable throughout the event.
We see hosts build excellent master documents and then undermine them by having three people answer vendor questions on event day. Vendors get conflicting answers, make independent decisions, and the run sheet falls apart. The document is not the system. The person who enforces it is.
Hiring a day-of coordinator is worth the cost when you have more than six vendors, a venue with strict technical requirements, or a personal stake in the event (it is hard to enforce a run sheet at your own wedding). A coordinator costs less than the catering overage you will approve under stress without one.
When your vendor list includes DJ services, photo booths, AV equipment, or karaoke, Porcci NYC delivers, sets up, and breaks down everything according to your run sheet. You share the timeline and floor plan; we handle the technical execution. That means one fewer vendor to chase on event day and a setup that arrives on time, tested, and ready.
Porcci NYC serves events across NYC and New Jersey, from intimate private parties to large weddings and corporate events. Services include DJ services, AV and sound system rentals, photo booths, karaoke systems, professional lighting, and event staffing with full setup and breakdown included.
Ready to lock in your entertainment and AV? Request a quote and we will confirm availability, walk through your run sheet requirements, and send a package that fits your timeline and budget.
• Event logistics: how to plan event logistics (Cvent blog)
• How to keep event vendors on schedule | EventRundown
• How to coordinate vendors without a planner (Sortra)
• How to make a great first impression | Harvard Business Review
Build a master document with every vendor’s contact, arrival window, and payment status, then send each vendor a filtered timeline showing only their items. Confirm everything in writing and assign one point person to handle all vendor communication on event day.
Definitions vary across planning frameworks. A common version covers concept, coordination, control, culmination, and closeout, though different sources use slightly different terms. The core idea is that a successful event moves through planning, execution, and wrap-up as distinct phases.
Professional, specific outreach increases response quality and trust, per Harvard Business Review’s research on first impressions. Provide vendors with a clear event brief, a realistic budget range, and a timeline upfront so they can assess fit quickly.
Vendors typically do not appear on the guest seating chart, but they do need a designated vendor meal area and break space noted on the floor plan. Include vendor meal timing in the run sheet so catering staff know when and where to serve them.